Last updated on May 25th, 2026.
In this fly tying vise guide we want to provide you with all the info you need on the best fly tying vises on the market.
Disclaimer: All products in this guide are independently researched by our team. We only recommend products we believe in and never get paid for the reviews. Learn more about our review process here.
There is little more exciting in fly fishing than seducing a fish to take a fly you tied yourself. To get started with tying is easier than you might think. Your flies won’t be perfect from the get go but simple patterns can be learned quickly.
In order to tie your own flies you need a tying vise, often also called tying vice. We give you an overview of the best fly tying vises on the market no matter whether you’re a beginner, advanced fly tier or expert.
Our Top Picks:
-
u003ca href=u0022#dynau0022 class=u0022ek-linku0022u003eu003cmarku003eDyna-King Professionalu003c/marku003eu003c/au003e
-
u003ca rel=u0022noreferrer noopeneru0022 href=u0022#griffinu0022 target=u0022_blanku0022u003eu003cmarku003eGriffin Odyssey Spider Viseu003c/marku003eu003c/au003e
-
u003ca href=u0022#peaku0022u003eu003cmarku003ePeak Rotary Viseu003c/marku003eu003c/au003e
-
u003ca href=u0022#atlasu0022 class=u0022ek-linku0022u003eu003cmarku003eAtlas Rotary Fly Tying Viseu003c/marku003eu003c/au003e
-
u003ca href=u0022#renzettiu0022u003eu003cmarku003eRenzetti Traveller 2200 Camu003c/marku003eu003c/au003e
-
u003ca href=u0022#regalu0022u003eu003cmarku003eRegal Medallionu003c/marku003eu003c/au003e
-
u003ca href=u0022#wolffu0022u003eu003cmarku003eWolff Industries Apex Rotaryu003c/marku003eu003c/au003e
-
u003ca href=u0022#saltwateru0022u003eu003cmarku003eRenzetti Clouser Cam Saltwater Traveleru003c/marku003eu003c/au003e
Table of contents:
Best Fly Tying Vises on the Market
Rotary Fly Tying Vise vs Fixed Jaw
Best Fly Tying Vise Reviews
We picked vices for all levels of fly tying to make sure you choose the right product no matter your level of fly tying. At the end of the article we will also explain what to pay attention to when choosing your vise. You might think: do I need a rotary vice or can I do with a tying vise with fixed jaws? Don’t worry, we got you covered here. Let’s go!
Dyna-King Professional Vise
Key features:
– Four positive locking angle adjustments for stable tying
– Fully machined with high quality stainless steel and aluminum for extra durability
– Made in the USA. Dyna King Inc. has been in the business for almost 40 years
Why we picked it:
The Dyna King Professional is everything you are looking for in a high-end fly vice. The fully rotating vise comes with a sophisticated quick clamping system. It can be precisely adjusted to hold hook sizes from #10/0 all the way to #32. The clamping jaws have two notches of different sizes, which are designed for medium and very large hooks. The Dyna-King Professional can be brought into a horizontal position as well.
PROS:
-
Excellent build quality – made in the USA
-
Highly versatile
CONS:
-
Needs a bit of knowledge to take full advantage of
Griffin Odyssey Spider Vise
Key features:
– 100% made in the USA.
– 360-degree rotation
– Jaw capacity of 28 to 4/0
Why we picked it:
The Griffin Odyssey Spider Vise is probably the best fly tying vise for the money if you are just getting started. It has everything you ask for in a fly tying vice: a bobbin holder which is a prerequisite for a rotary vice (360 degree rotation). The advantage of a rotary fly tying vise is it’s versatility. The rotation enables you to tie more advanced flies more easily. The only disadvantage we found in the Griffin Odyssey Spider Vise is the fact that you have to clamp it to a table, it cannot stand on its own.
PROS:
-
Lifelong guarantee
-
Fully rotating
CONS:
-
C-clamp limits versatility
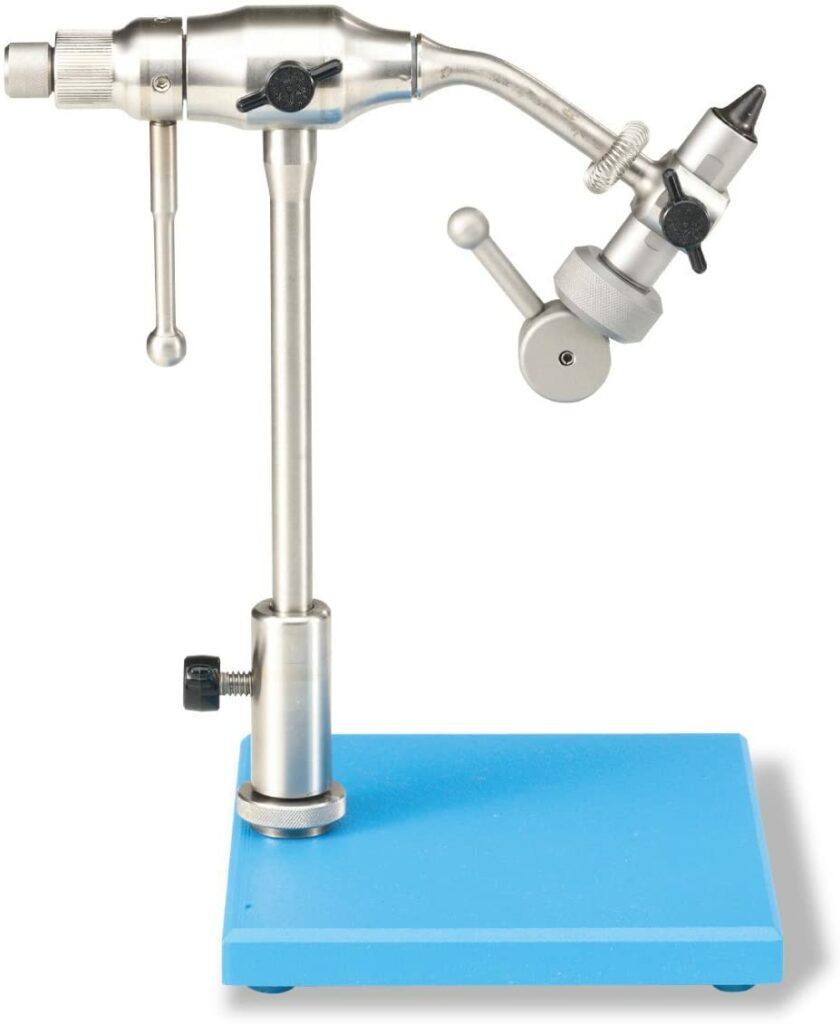
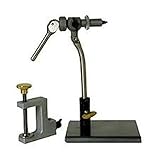
Peak Rotary Fly Tying Vise
Key features:
– Tempered tool steel jaws securely hold hooks from size 2/0 to the smallest hooks around
– The pedestal base is heavy and stable and holds the vice in place safely
Why we picked it:
The Peak Rotary Vise is another great fly vise for the money. At around $150 it is a great choice for fly tiers who are a little more advanced already. You can get the Peak Rotary with a C-clamp or a pedestal base. The Peak Rotary Vise features a minimum design to focus on what’s essential. It is made from super stable materials including stainless steel and aircraft aluminum.
PROS:
-
Pedestal base and C-clamp available
-
Wide variety of hooks usable
CONS:
-
No lifetime warranty
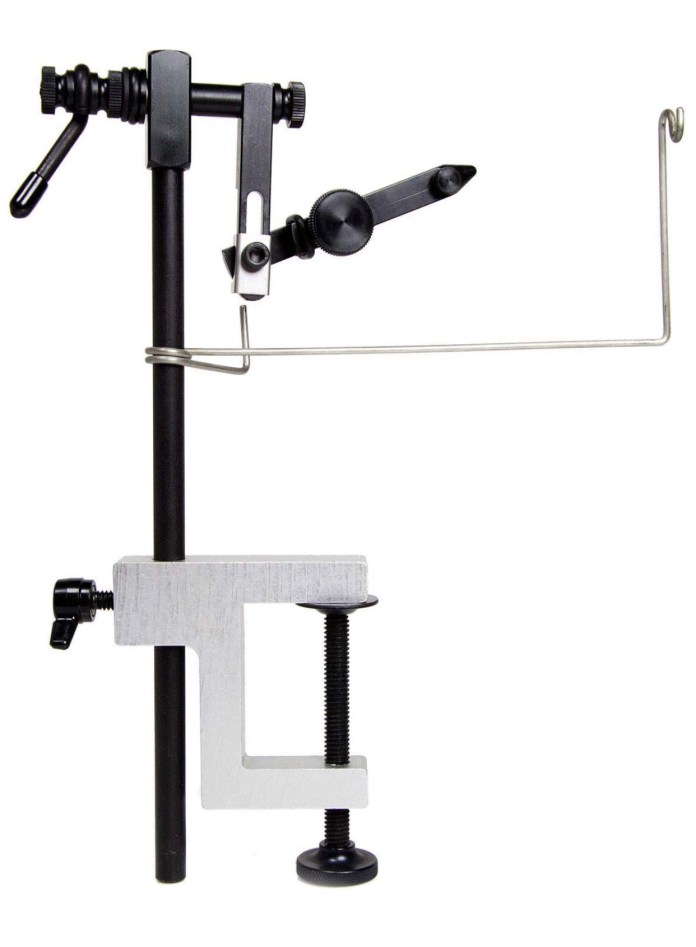
Atlas Rotary Fly Tying Vice
Key features:
– All stainless steel construction made in the USA
– Very sturdy setup. C-clamp holds tightly and base is very heavy
Why we picked it:
The Atlas Rotary Vise is an excellent choice for intermediate fly tiers. Built like a tank the full rotary vise features a rock solid pedestal and a C-clamp. A material clip is included as well but no bobbin cradle. Holds hooks in all sizes from 2/0 all the way down to 18. Downside: The plastic screw that holds the main arm can be a little weak at times.
PROS:
-
Great overall vise if you are looking to spend less than $200
-
All stainless steel
CONS:
-
Main arm fixation can be a bit tedious
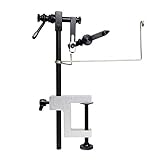
Renzetti Traveller 2200 Cam
The Renzetti Traveler 2200 has the following features:
– All parts of the traveler are anodized for extreme durability
– Renzetti claims the strongest hook holding power in the industry
Why we picked it:
With the Renzetti Traveler 2200 you enter the territory of professional fly tiers. First introduced in 1988 the Traveler Rotary Vise has been extremely popular ever since. The Renzetti Traveler 2200 comes in two versions: pedestal or C-clamp which makes it even lighter, ideal for travelling as the name suggests.
PROS:
-
Handcrafted in the USA
-
Great for travelling
CONS:
-
Not quite as sturdy due to lightweight construction
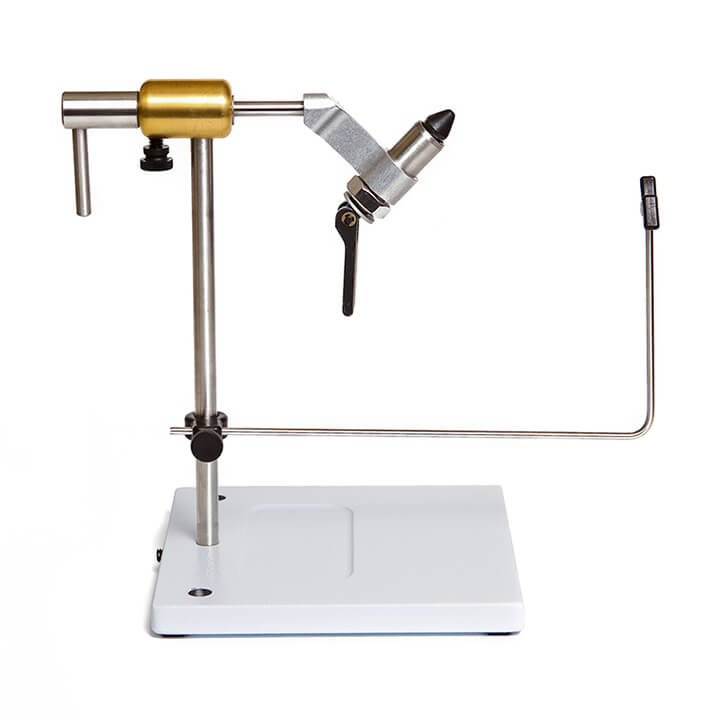
Regal Medallion Fly Tying Vise, Traditional base
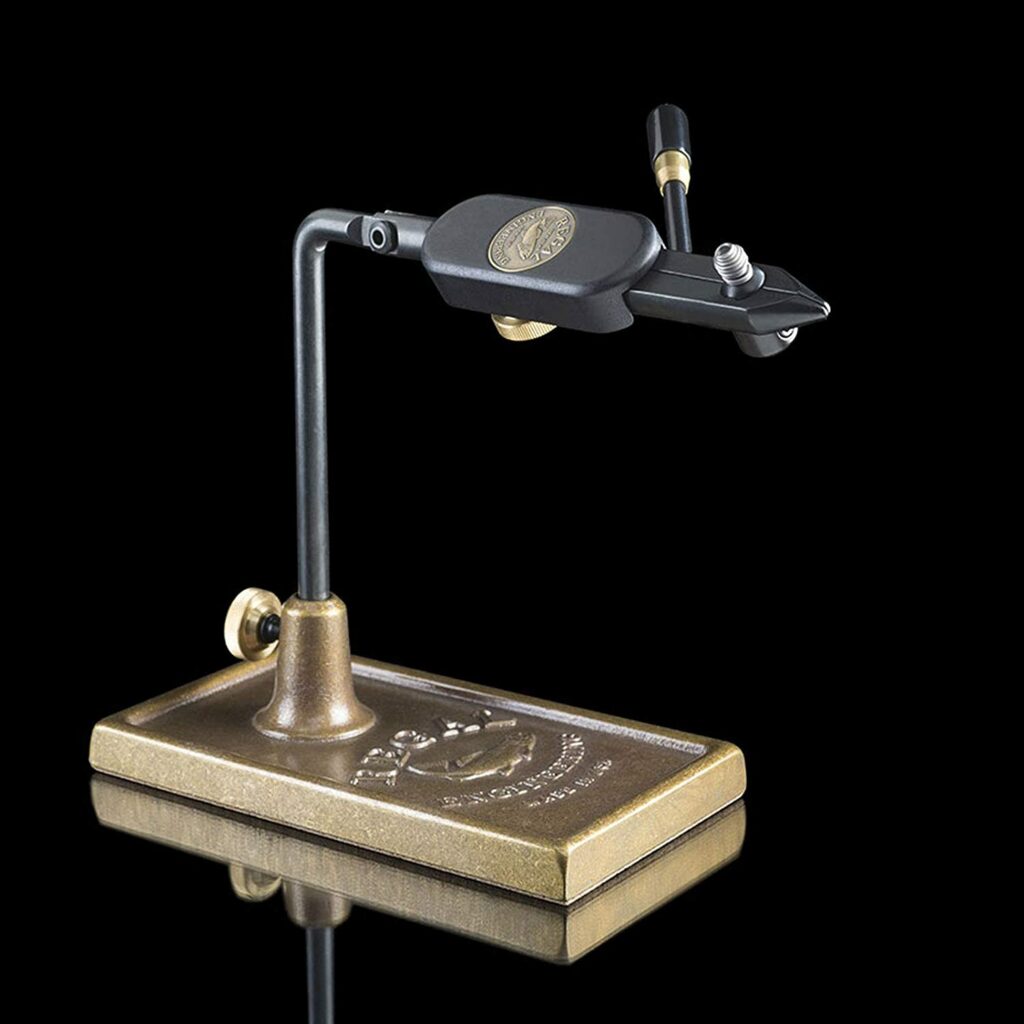
Key features:
– Revolves 360 degrees and articulates 220 degrees up and down
– Ultimate hook holding power
Why we picked it:
The Regal Medallion is one of the best products on the market. Yes, you have to invest a bit of money but if you are a serious fly tier you won’t regret spending your money on a Regal vise. Regal’s flagship product can be used to tie any fly ranging from small dries and nymphs all the way up to big streamers for large predators. The Regal Medallion is fully rotating and articulates up and down by 220 degrees.
PROS:
-
Ultimate versatility thanks to incredible rotation options
-
Plenty of options to customize your Regal – great as a gift
CONS:
-
Minimalist style is great but you need some experience fly tying
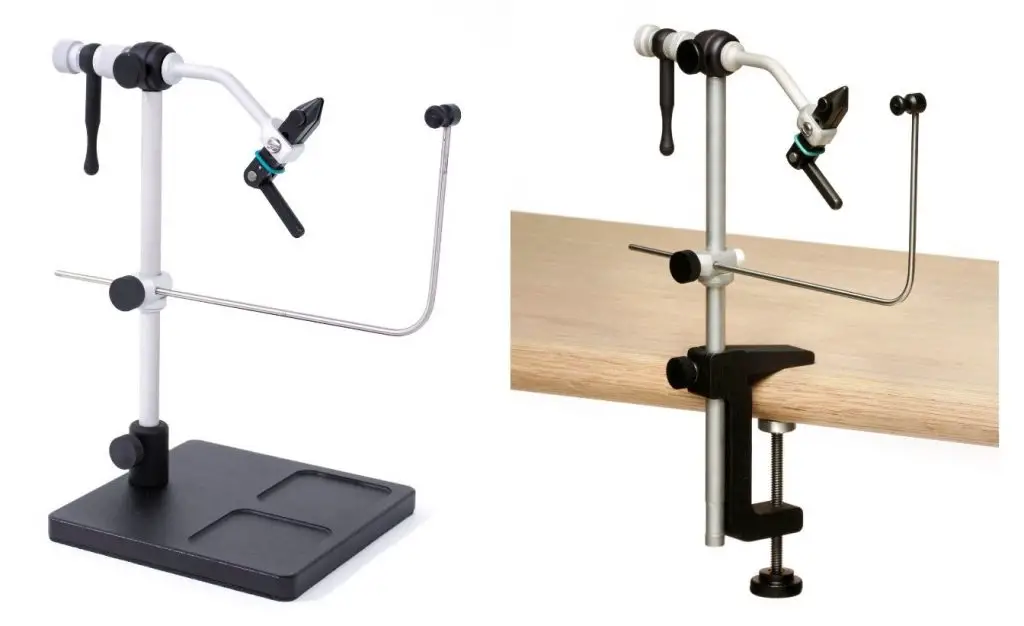
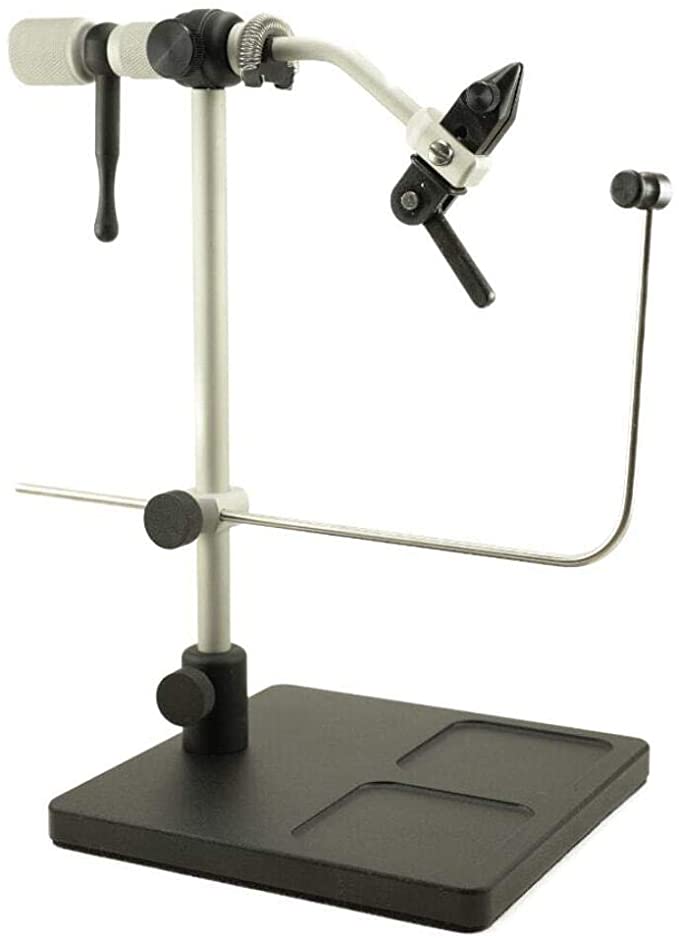
Wolff Industries Apex Rotary

Key features:
– 360 degrees rotation
– Excellent hook holding capabilities
Why we picked it:
The Wolff Industries Apex Rotary is another hugely popular vise amongst fly tiers. It comes with a lifetime warranty that gives you peace of mind in case something does not work as planned. The rotary vise enables a 360 degree jaw rotation. Stainless steel, extra tough around the jaws, ensures a long lasting quality product. Grooves in the jaws ensure a secure fit of the hook when tying with the Wolff Industries Apex Rotary. A clamp on the pedestal allows for a vertical or angled operation. You can switch the solid pedestal for a C-clamp if you prefer to attach your vise to your tying desk.
PROS:
-
Lifetime warranty
-
Highly versatile with pedestal and C-clamp
CONS:
-
Not quite as sturdy as the Regal
Renzetti Clouser Cam Saltwater Traveler Series
Key features:
– Built to tie the largest flies for saltwater species
– C-clamp and pedestal available
Why we picked it:
If you are into saltwater fishing and want to tie your own patterns to catch bonefish, stripers and co., make sure to check out the Renzetti Clouser Cam Saltwater Traveler Series. Named after one of the game’s most famous people, Bob Clouser, this vise allows to tie larger saltwater flies such as the Clouser Minnow. Just like its brother, the Renzetti Traveler 2200, the Renzetti Clouser Cam Saltwater comes in a pedestal and c-clamp version. However, the saltwater series can hold larger and stronger hooks which are essential when hunting strong saltwater species.
PROS:
-
Unmatched when it comes to tying big streamers
-
Excellent grip even on big hooks
CONS:
-
Not ideal if you also want to tie tiny flies
Best Fly Tying Vise Lamps
Now that you have a good overview of the best fly tying vises out there on the market, we want to focus on one of the most essential gadgets when it comes to tying your own flies: the fly tying vise light. If you have a bright desk lamp you might as well use that one but if you are new to tying you can consider getting a fly tying light together with a vise. Here are a few good options for you to consider.
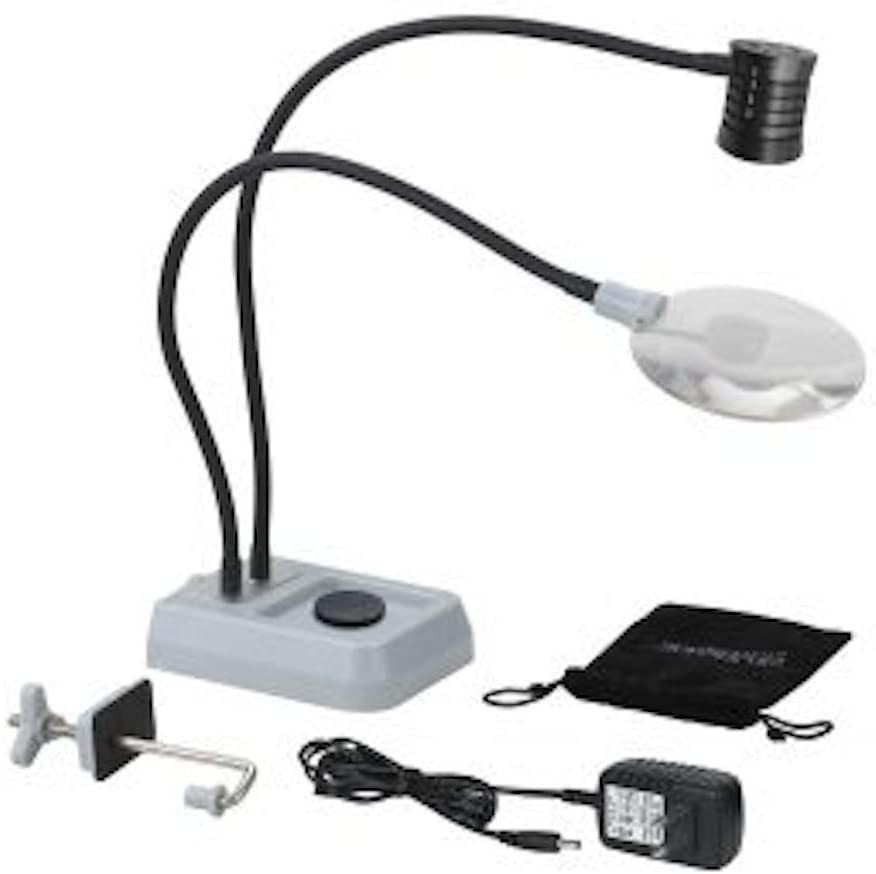
Brightech LightView Pro Fly Vise Light
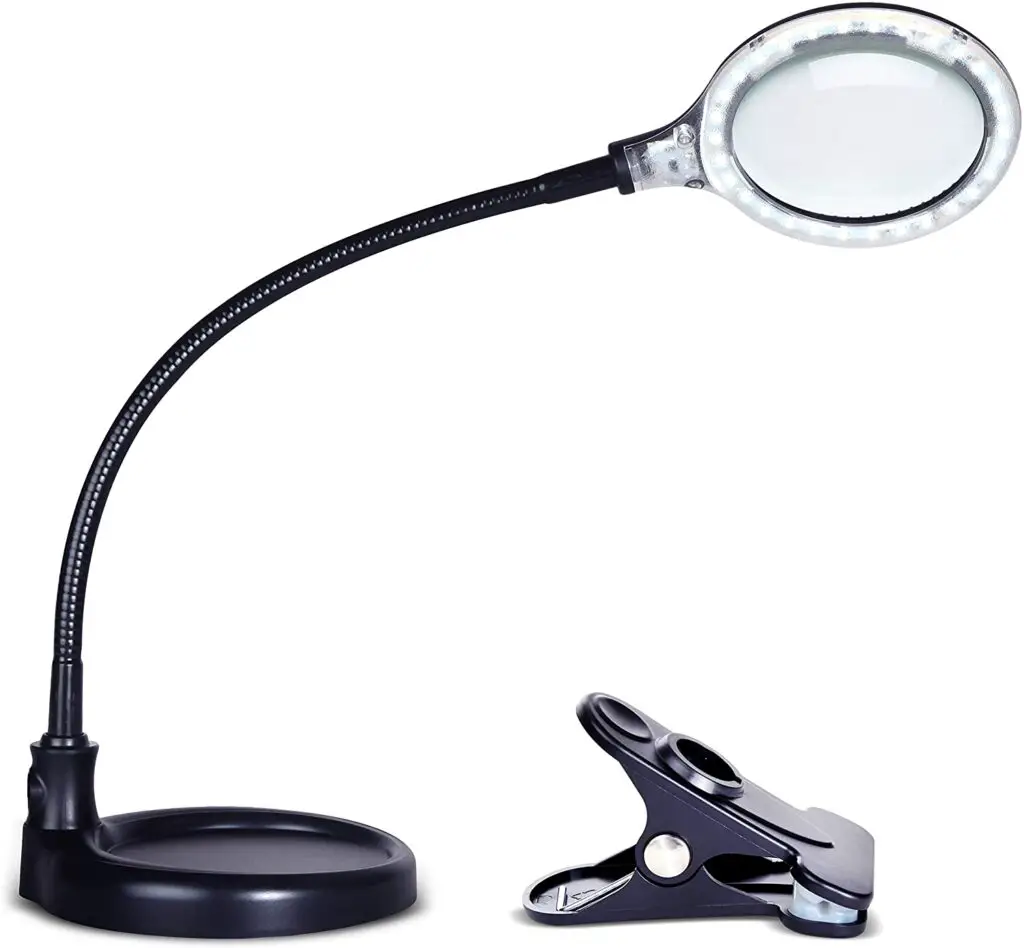
Why we picked it:
For a little over $30, the Brightech LightView Pro Fly Vise Light offers a great entry level fly vise light. It features an integrated 1:1.75 magnifying glass surrounded by a bright LED light. If your eyes are a little weak or if your tying room is not perfectly lit, the Brightech LightView Pro will offer you everything you need to tie your flies with precision. There is even a version with a 1:2.25 magnification.
The Brightech LightView Pro comes with a heavy base and a clip, so you can choose how you want to use it at your tying desk. The gooseneck is highly flexible and you can easily bring it into the position you desire. The fly vise magnifiers and lights of the Brightech LightView Pro are very reliable and will last you a long time.
Carson MagniFly
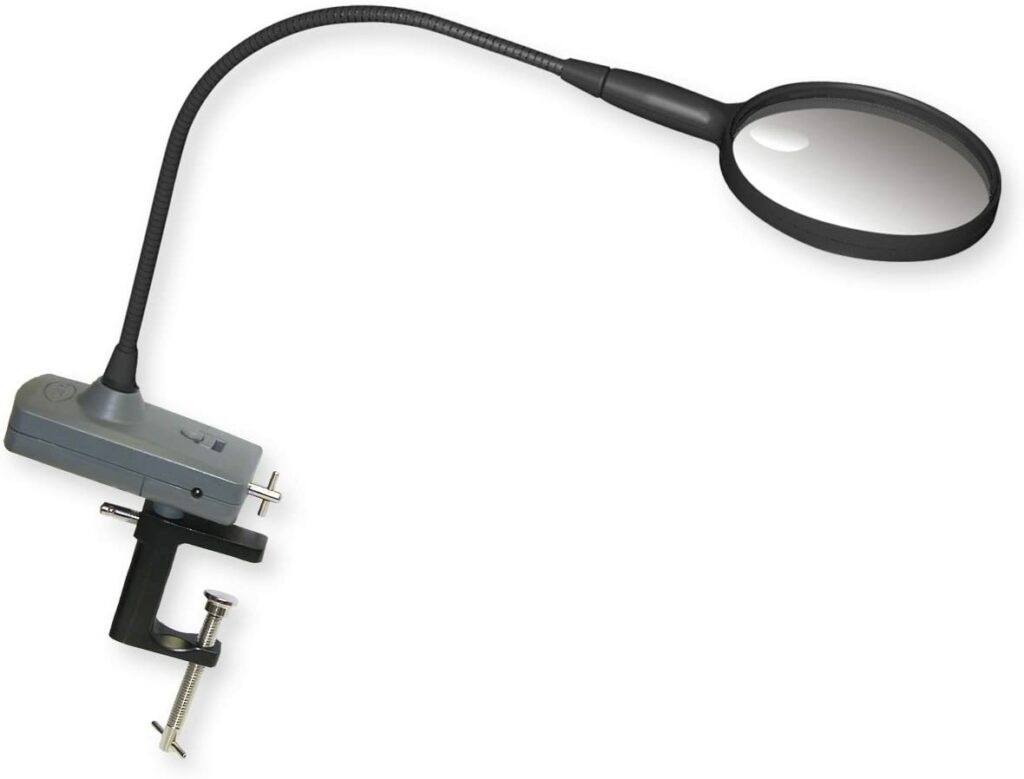
Why we picked it:
The Carson MagniFly is another solid option if you are looking for a fly vise light. In contrast to the Brightech LightView Pro it only comes with a C-clamp which means you can attach it to your tying desk but it doesn’t feature a base that enables it to stand on a desk.
The Carson MagniFly features a 2x magnification and the LED comes with 3 very bright LED bulbs. It can either be run on power with an 4.5v AC/DC adapter or on batteries (which you will have to get separately). Comes with a limited lifetime guarantee.
Alert FTL130 LED Fly Tie Light
Why we picked it:
With 220 Lumen, the Alert FTL130 LED Fly Tie Light offers maximum brightness. Thanks to separate LED lights and magnifiers you can use them individually. The overall magnification is 2x but the Alert FTL130 LED Fly Tie Light offers up to 10x spot magnification which makes it an excellent choice for the ones whose eyes have gotten a bit weaker over the years.
The Alert FTL130 LED Fly Tie Light comes with a solid base and a C-clamp so you have the choice in attaching it to your fly tying desk. The base even features a small built-in storage tray and magnet.
Best Fly Tying Vise Knowledge
In this section we want to give you more information on what to be aware of when choosing your tying vise. We will cover why it makes sense to tie your own flies, which product is good for you and what features in a vise are important.
Why you should Consider Tying your own Flies
Some fly fishermen tie their own flies, others don’t. While there is no need to tie your own flies we want to give you advice on why we think it’s a good idea.
First and foremost: we think you’ll become a better fly fisher if you start tying your own flies. The reason behind this is the fact that you will become more knowledgeable about insects and their artificial counterparts that tiers try to imitate.
If you are on a fly fishing trip for example and bring along your vise (look for a travel model) you can quickly adapt to the conditions and tie a few flies at night that might make a difference the next day.
Especially nymphs can be tied easily and quickly. Techniques such as euro nymphing have become increasingly popular in recent years – most of all because they are so successful.
Last but not least catching fish with your own creations is incredibly fun and satisfying.
What type of vise do I need?
In order to purchase the right product you should ask yourself the following questions before getting one.
How much time are you spending tying flies?
If you only tying flies every once in a while it probably doesn’t make sense for you to invest hundreds of dollars in the most sophisticated vise. The same holds true if you are only getting started.
What types of flies are you tying?
If you are mainly tying flies for trout any of the vises we reviewed above will work just fine for you. If you consider tying saltwater flies you might want to consider getting a vise that can hold large saltwater hooks: recommendable models are the Renzetti Saltwater Traveler or the Regal Big Game Head and Travel Base.
Clamp or Pedestal Vise
The question whether you prefer a clamp or pedestal vise can only be answered by yourself. Here are the advantages of the respective versions.
A vise with a clamp can be attached to any table and is hence very versatile. It is easier for travelling because the pedestal is often very heavy and sturdy to ensure a stable setting on a table. Several of the models we reviewed above come in both version for you to choose from.
Rotary Fly Tying Vise vs Fixed Jaw Vise
A fixed jaw vise has no option to rotate. It comes in one position that is not changeable. Most modern day vises are rotary vises.
What is a Rotary Fly Vise?
In a rotary fly tying vise the head can rotate. When you are tying more advanced flies a rotary vise makes adding materials to your creations easier. When tying a fly you can hold the material steady and simply rotate the head which can increase precision and result it better tied flies.
Do you need a Rotary Vise?
Of course you could argue that a rotary vise is not necessary. It won’t help you become a better tier. You will have to learn the fundamentals no matter what type of vise you use. If you are just starting out your first vise might not have to be a rotary vice. Once you’re sure you will stick with tying and have learned the basics a rotary vice can make your tying life easier.
How much should you Spend on Fly Tying Vises?
Since everybody has their own budget it is difficult to give a simple answer here. You can definitely start tying flies with a vise such as the Griffin Odyssey Spider Fly Tying Vise which will cost you less than $100. If you are looking for something a little more advanced medium-priced vises between $150 and $200 are a good choice, for example the Atlas Rotary Vise or the Renzetti Traveler 2200 Vise. If fly tying becomes your passion you can invest more than $350 to get some of the best fly tying vises on the market such as a Dyna King Professional or a Regal Revolution.

Last update on 2026-06-22 / Affiliate links / Images from Amazon Product Advertising API
Our Expertise
Why you should trust us: Leonard Schoenberger and his team have tried and tested hundreds of rods, reels and other fly fishing gear over the years. We always express our honest opinions about a product to help you make a solid purchase decision. We never get paid for reviews and are proud of keeping our editorial independence. Our focus is on bringing you the latest in gear so you can have a great time at the water. Thanks for being a reader of The Wading List.
Frequently Asked Questions: Best Fly Tying Vise
u003cstrongu003eWhat is a fly tying vise?u003c/strongu003e
A fly tying vise is a tool used in fly fishing to hold the hook of the fly securely while materials are added to create the final fly. It’s an essential tool for any angler who ties their own flies.
u003cstrongu003eWhat should I look for in a fly tying vise?u003c/strongu003e
When choosing a fly tying vise, consider its holding power, adjustability, size, and material. A good vise should hold a wide range of hook sizes securely and allow for easy adjustments. The size should fit comfortably in your workspace, and it should be made from durable materials to withstand frequent use.
u003cstrongu003eWhat are some of the best brands for fly tying vises?u003c/strongu003e
Some of the top brands for fly tying vises include Griffin, Renzetti, Regal, and Peak Fishing. These brands are highly regarded in the fly fishing community for their quality and performance.
u003cstrongu003eIs a rotary vise necessary for fly tying?u003c/strongu003e
While a rotary vise is not strictly necessary, many fly tiers find them extremely useful. A rotary vise allows you to rotate the hook in place, providing easier access to all sides of the fly. This can make tying more efficient and enjoyable.
u003cstrongu003eWhat’s the difference between a pedestal base and a clamp base in a fly tying vise?u003c/strongu003e
A pedestal base vise is heavy and stable, designed to sit on a table or desk. A clamp base vise, on the other hand, is designed to attach to the edge of a table or bench. Both have their merits, and the choice between them often comes down to personal preference and workspace setup.
u003cstrongu003eHow do I maintain my fly tying vise?u003c/strongu003e
To maintain your fly tying vise, clean it regularly to remove any dirt or fly-tying materials. Lubricate any moving parts as needed, but be sure to use a non-greasy lubricant that won’t interfere with your fly tying materials.
u003cstrongu003eWhat’s the typical cost of a good fly tying vise?u003c/strongu003e
The cost of a fly tying vise can range widely depending on the brand, materials, and features. You can find budget-friendly vises for around $50, while high-end vises from premium brands can cost several hundred dollars.
Additional Resources
If you are looking for additional resources make sure to check our other stories in “Fly Tying“.
Here are some how to’s for a number of different flies:
CARP FLIES: A TASTY BREAD PATTERN
FLY FISHING NYMPHS: A NEON UNDERWATER SHOCKER
SAND EEL FLY: A SIMPLE AND EFFECTIVE PATTERN
PIKE FLIES: EFFECTIVE PATTERNS FOR PREDATORS
Notice: The Wading List is reader-supported. We take part in so called affiliate programs such as amazon associates or avantlink. If you click on one of the links in this article and end up purchasing a product we might earn a small commission at no extra cost for you. Thank you! All images courtesy of amazon.
How a fly tying vise actually works
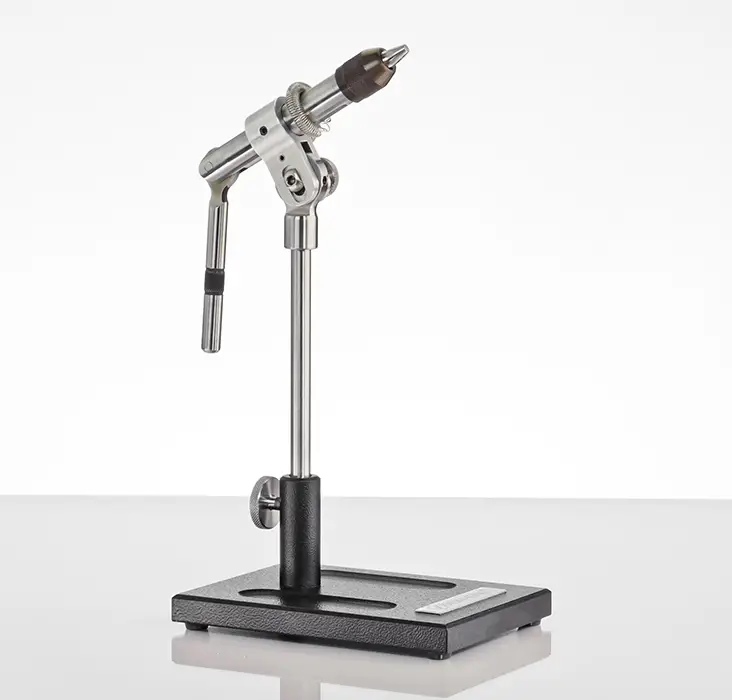
A vise has three mechanical layers: a head with jaws, a stem that the head sits on, and a base that anchors the whole assembly to your tying surface.
The jaws are the contact point. A hook is held by clamping its bend or its shank between two opposing jaw faces, with closure force generated by either a cam mechanism (a lever rotates an eccentric, driving a draw-bar that pulls the jaws together against a hook trapped between them) or a spring-and-collet mechanism (the Regal pattern, where opening the jaws requires squeezing a lever and the spring closes the jaws around any hook you insert, so changing hook sizes happens by squeeze, drop, release rather than by re-dialing a tension screw). Either approach must generate enough clamping force to immobilize the hook against the torque of wrapping a hackle feather around the shank, and against the pull of cinching thread down hard enough to compress dubbed fur.
Above the jaws sits the head, and on a rotary vise the head turns on an axis. The axis matters. If the rotation axis passes directly through the hook shank, the hook spins in place when you turn the head: the fly stays at eye level, and any material you have already wrapped does not get displaced. This is true-rotary geometry. If the axis is offset above or below the shank, the hook orbits around the axis instead of spinning in place: the fly drops below eye level on each rotation, and you have to track it visually rather than letting it stay in the same spot. That is in-line, non-true-rotary geometry, sometimes marketed as “rotary” because the head physically turns even though the hook does not stay on-axis.
Below the head, the stem holds the head at a working height (usually adjustable, so you can drop the hook closer to the bench for big streamer work or raise it for fine midges). The stem terminates in either a pedestal (a heavy disc or plate the vise stands on, balanced by mass) or a C-clamp (a screw clamp that anchors the vise rigidly to the edge of a workbench or table). Both work; they trade portability for absolute rigidity.
The dominant jaw material on serious vises is hardened tool steel. Hooks themselves are high-carbon spring steel; the jaw face has to be harder than the hook to grip without the hook leaving an indent in the jaw, and harder than the hook to resist wear from gripping thousands of hooks over the vise’s life. Cheap vises use softer steel, and after a few hundred flies the jaws have visible grooves and the hook starts slipping. A vise spec’d for lifetime use has jaws hardened to roughly 60 HRC and ground to a closure geometry that contacts the hook on at least two faces under the closing cam.
True-rotary versus in-line rotary
The performance difference between true-rotary and in-line rotary geometry shows up in two specific tying motions: wrapping hackle and applying dubbing.
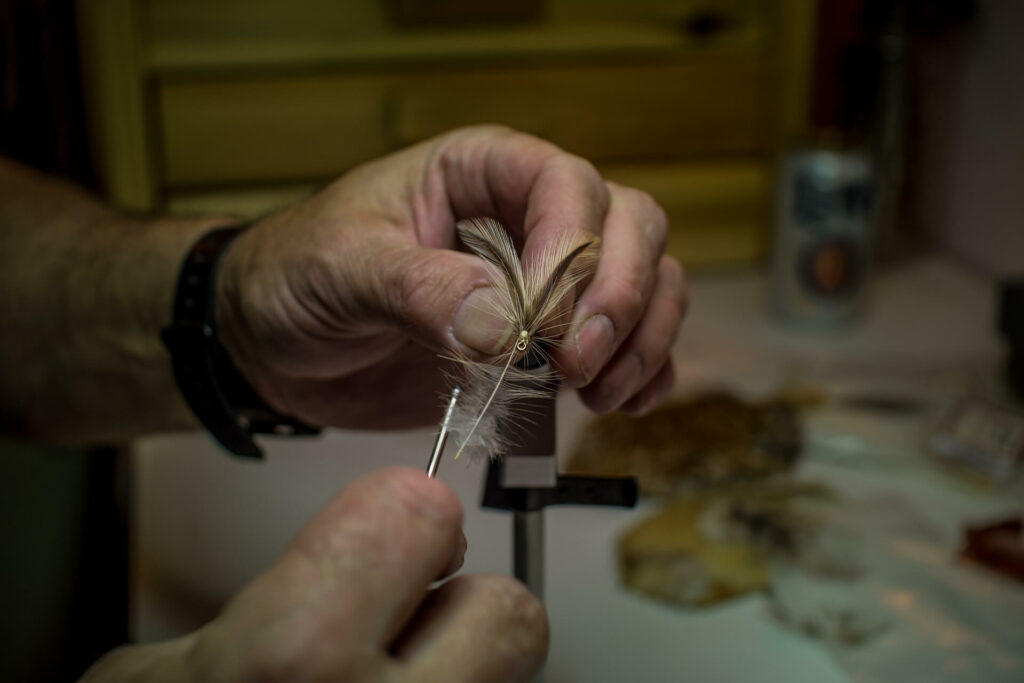
When you tie a hackled dry fly (a Parachute Adams, a Royal Wulff, an Adams parachute), you wrap a hackle feather in tight, evenly spaced turns around the hook shank. On a fixed-jaw vise, you hold the feather in hackle pliers and walk those pliers in a circle around the hook with one hand, while the other hand catches and steers the stem of the feather. On a true-rotary vise, you clip the feather to the rotary head’s hackle clip and spin the head with one finger; the feather wraps itself, because the hook stays on the rotation axis and the feather is essentially fed onto the shank by the spinning. The number of wraps per second roughly triples, and the wrap spacing is more even because rotation speed is constant where hand-walking is not.
Dubbing benefits in the same way. Dubbing is fur or synthetic fibre twisted onto a strand of tying thread to form a soft, tapered noodle that you then wrap up the hook to build the body of a nymph or dry fly. On a true-rotary vise, you load the noodle onto the thread, then spin the head to wrap the noodle up the shank in a single continuous motion. On a fixed-jaw or in-line vise, you wrap by hand, which is slower and tends to produce uneven dubbing density.
The case for true-rotary is strongest if you tie in volume (50 to 100 flies in a session, restocking boxes before a guiding trip or for a swap), and strongest if you tie a lot of patterns with palmered hackle or dubbed bodies. The case for fixed-jaw or in-line is strongest if you tie small numbers of varied patterns, where the time saved on rotation is small and the cost difference funds better jaws or a better base.
Jaw geometry and hook range
Every vise has a stated hook range, typically expressed as something like “size 28 to 4/0.” That range is a spec sheet claim, and the underlying mechanical reality is closure angle and tip geometry.
The jaws close at an angle. When the cam pulls them shut around a small hook, the jaws have to travel further to close before they grip; on a big hook, the jaws barely move before they contact. A jaw geometry optimized for the small end of the range tends to have fine, narrow tips that grip a #22 trico without bending the hook out of shape, but those same fine tips may flex when you try to clamp them down on a 2/0 saltwater streamer hook with a 1/16-inch shank diameter. A jaw geometry optimized for streamers has thick, blunt tips that bite hard on heavy wire but cannot close cleanly on a #28 midge because the closing tips meet each other before they ever touch the small hook.
The vises that genuinely span the full range (Renzetti Traveler series, Regal Medallion, Dyna-King Barracuda) achieve it either with interchangeable jaws (you swap from midge jaws to streamer jaws by unscrewing one jaw assembly and threading on another) or with a cam profile and jaw shape engineered to grip across the range from a single jaw set. The interchangeable approach is more honest about the physics; the single-jaw approach is faster between hook sizes and is what most tiers reach for in practice.
The criterion when choosing a vise is not what the spec sheet claims. It is whether the vise holds the smallest hook you actually tie without the hook slipping when you put thread tension on it, and whether it holds the largest hook you tie without the jaws flexing when you wrap heavy material around the shank. For a tier who fishes Western tailwaters and the salt, that means roughly #22 midges at one end and 2/0 baitfish patterns at the other; for a strict trout dry-fly tier on small streams, it might be #20 to #10.
Pedestal versus C-clamp
The pedestal is a heavy, often cast-iron or steel disc that the vise stem sits in. The mass of the disc holds the vise stable on a flat surface. dry fly patterns Pedestals are portable (you set the vise on any table, no clamping required, and pack it back into the kit when you are done), and they are silent in the sense that they do not transmit thread tension into a workbench creak.
The C-clamp threads onto the edge of a workbench. It anchors the vise rigidly into the bench: there is no possibility of the base sliding under load, because the vise is physically continuous with the table. C-clamps win for heavy streamer work, for wrapping thick wire-and-lead-wire bodies, and for any motion where you need to pull hard on the materials without the vise rocking. They lose for portability (you need a bench edge that fits the clamp throat, every time) and they require the table to be thick enough that the clamp’s screw foot does not crush soft wood.
A pedestal on a smooth, heavy table is functionally as stable as a C-clamp for most trout-scale tying. The C-clamp pulls ahead when the hook is large, the materials are heavy, and the tying motions are forceful. Many serious tiers own both bases and swap depending on the session.
Materials and tools that go with the vise
The vise is one tool in a system. A tier sitting down to wrap a fly needs the vise plus the rest of the kit: a bobbin holder (maintains tension on the tying thread while you have both hands occupied), a whip-finisher (the tool that ties the final knot to lock the thread off at the head of the fly), hackle pliers (grip and rotate hackle feathers when you are wrapping by hand), bodkin (a needle on a handle, used to free trapped fibres and apply head cement), and scissors fine enough to cut thread without crushing the fibres on either side of the cut.
Beyond the tools, the consumables: hooks across the size range you tie, tying thread (UTC 70 and 140 denier covers most trout work), dubbing in the colors that match your local hatches (olive, tan, brown, black, grizzly for parachute posts), hackle (rooster necks and saddles for dry flies, hen for wet flies and soft-hackles), beads (brass, tungsten, copper, in 1.5mm to 4mm), wire ribs, and the natural materials (peacock herl, partridge, pheasant tail, elk hair, deer hair, marabou) that show up in pattern after pattern.
If you are building a tying setup from scratch, the vise is one of seven or eight decisions, not the only one. Our beginner kit page covers the full bench layout: best fly tying kits goes deep on the kit-level decision and is the right starting point if you are not already invested in the hobby.
Where the picks fit by hatch and species
The vise you need is shaped by the flies you are going to tie, and the flies you are going to tie are shaped by where you fish and what you fish for.
A tier matching trout hatches in Western US tailwaters or in alpine European streams works in a hook size range that runs from #28 midges through #10 mayfly nymphs and dries, with the occasional #8 streamer for swinging. This sits in the sweet spot of the mid-tier true-rotary workhorse vise: jaws spec’d for the trout range, true-rotary geometry that pays back when wrapping hackle on parachute Adams patterns and dubbing on Pale Morning Dun nymphs.
A tier focused on saltwater (bonefish in the Bahamas, permit in Belize, tarpon in Florida, striped bass in the Northeast) is tying in the 1/0 to 5/0 range with heavy bucktail, synthetic flash, and weighted shanks. This is where the trout-range vise hits its mechanical limit and the saltwater-streamer specialist slot earns its premium: jaw mass and base mass both have to absorb the torque of wrapping heavy material around a 4-inch hook.
A tier specializing in two-handed steelhead and Atlantic salmon swinging tube flies and traditional featherwings works largely in the 2 to 4 inch range on tubes and large salmon hooks; this overlaps with the streamer specialist and with the premium lifetime vise, depending on whether the focus is volume tying or one-off heritage patterns.
A tier learning the craft and tying mostly to fish small streams locally is best served by the entry-level rotary or the workhorse mid-tier, depending on budget. The premium lifetime vise pays back over years; it does not pay back in the first six months.
If you are still deciding what fly fishing you want to do before you decide what to tie, our trout-focused gear pages will help map that out: best trout fly rod walks through the rod-action and weight decisions that anchor the rest of the rig, and best fly fishing nets covers the catch-and-release tier of equipment that pairs with serious trout pursuit. The fly you tie at the bench is the last link in a chain that runs from the rod that lands the line on the water, through the leader and tippet that present it, to the fly itself.
How to choose
The honest decision is two questions stacked on each other.
First, how many flies are you actually going to tie per year? If the answer is under 100, the entry-level fixed-jaw or entry-level rotary slot is enough; the premium vise will not pay back its price in skill development, because the limiting variable is the tier’s hands, not the tool. If the answer is 100 to 1,000, the mid-tier true-rotary workhorse is the right slot, and the rotation function will pay back daily on hackled and dubbed patterns. If the answer is over 1,000 or you tie commercially, the premium lifetime slot earns its price.
Second, what hook range do you actually tie? If you tie strict trout dries from #14 to #20, a mid-tier vise with fine-geometry jaws is enough. If you tie across the full trout-and-streamer range from #22 to 2/0, you want either interchangeable jaws or a single jaw set engineered for the full range; the Regal squeeze mechanism and the Renzetti Traveler cam are the two canonical solutions. If you tie saltwater or pike-musky scale flies, you need the streamer-specialist slot, full stop; trying to tie a 5/0 sand-eel pattern on a midge vise is mechanical malpractice.
The third question, after those two, is whether you tie at one bench or on the road. If you travel to lodges, fish-out weeks, or tie at the river, the compact-traveler slot with a C-clamp pays back the day you do not have to leave the kit at home.
The category exists because tying your own flies is the precision-tool extension of the entomology and hatch-matching skill that defines fly fishing. The vise is the apparatus that makes that precision physically possible. The right vise is the one whose mechanical envelope (jaw range, axis geometry, base anchoring) is wider than the envelope of flies you actually tie, with enough margin that the vise is never the limiting factor.
The vise that holds the smallest hook you tie without slipping, and the largest hook you tie without flexing, is the right vise. Everything else is preference, brand loyalty, and the secondary question of how much rotary geometry buys back your tying time.
Leonard Schoenberger is a fly fishing professional and gear specialist with over 20 years of experience on the water. As the manager of Heidarvatn, a world-class sea trout lodge in Iceland, his product recommendations and tactical advice are tested in some of the most demanding conditions on earth. His expertise has been mentioned in The New York Times, the Financial Times, and at the Outdoor Media Summit.