- The Altitude of Ambition - February 10, 2026
- Can YETI’s new backpack deliver? Thoughts on the YETI CAYO - November 20, 2025
- How to Put a Worm on a Hook: Proven Methods for a Perfect Bait - November 18, 2025
The Angler’s Knot Confidence Blueprint
You don’t need to learn hundreds of knots to be a successful angler. By mastering just 3-5 essential knots and understanding how to tie them correctly, you can confidently handle the vast majority of fishing situations you’ll ever face.
- The single biggest factor in knot strength is proper technique. Simply lubricating your line with water or saliva before tightening prevents friction damage and dramatically increases reliability.
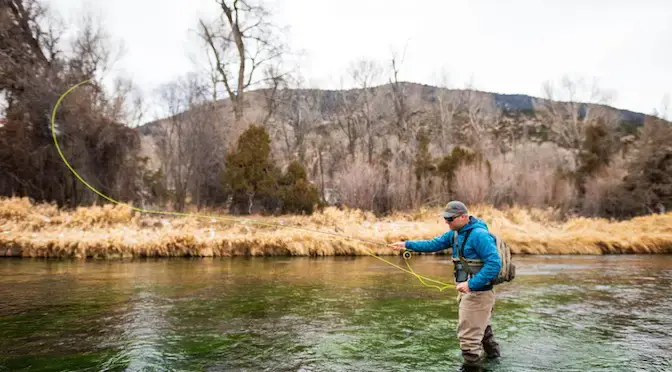
- A reliable knot is the foundation of all successful fishing, as it’s the final connection between you and the fish, directly impacting how you can catch more fish.
- Different knots are tools for specific jobs. The key is learning which knot to use for attaching a hook versus joining two lines together.
Why Your Knot is the Most Critical Link in Your Gear
A poorly tied knot is the weakest point in your fishing line and can easily cut its breaking strength in half. This makes knot failure the single most common reason for losing a fish, turning a moment of excitement into one of frustration.
By design, any knot is a potential weak point. A badly tied knot in standard monofilament line can break at less than 50% of the line’s rated strength, meaning your 10-pound test line might snap under just 5 pounds of pressure.
You should be skeptical of claims about knot strength. Performance figures over 50-70% are often unrealistic under real-world fishing conditions, so testing your own knots is the best way to build true confidence in your setup.
A good knot has two key characteristics: it’s compact and it’s reliable. It must be strong enough to hold under pressure but also smooth enough to pass through the guides on your fishing rod without snagging.
Specialized methods like fly fishing depend on a complete system of different knots to connect the backing, fly line, leader, and tippet. This chain of connections is only as strong as its weakest link, which is why having the best fly tying kits and materials is just the start.
The P.L.A.N. Protocol: A 4-Step System for Flawless Knots
The P.L.A.N. Protocol is a simple, 4-step system you can use to tie any fishing knot perfectly. Instead of just memorizing steps, use this universal protocol to ensure every knot you tie is as strong and reliable as possible.
- P: Prepare your line. First, select the right knot for your line material (e.g., monofilament, braid) and the specific job you need it to do, whether that’s attaching a hook, joining lines, or making a loop.
- L: Lubricate the knot. Before you pull it tight, use water or saliva to moisten the lines. This simple step prevents friction heat from weakening the line and allows the coils to slide together smoothly and securely.
- A: Apply steady tension. Pull the main line and the tag end with slow, even pressure. This allows the knot’s structure to form correctly and cinch down without any part of the line biting into and damaging another.
- N: Neatly trim the tag end. Once the knot is fully tightened and secure, use a nail clipper to trim the excess tag end close to the knot. This creates a clean finish that won’t snag on weeds or foul your line.
Your Starting Lineup: 5 Essential Knots for Every Angler
You can handle over 99% of common fishing situations by mastering these five essential, workhorse knots. Practice them at home until you can tie them with your eyes closed, and you’ll be prepared for anything on the water.
The Palomar Knot (The Strongest & Easiest)
Widely considered one of the strongest and easiest knots to tie, the Palomar is the top choice for securing hooks and lures, especially with slick braided fishing line.
- Double about six inches of line and pass the resulting loop through the eye of the hook.
- Tie a simple, loose overhand knot in the doubled line, leaving a large loop open.
- Pass the entire hook back through the large loop.
- Moisten the line and pull both the main line and the tag end to tighten it down. Trim the excess.
The Uni Knot (The All-Rounder)
This is an incredibly versatile knot for attaching your line to terminal tackle like hooks and swivels. It’s also excellent for joining two lines together.
- Run the line through the hook eye, then double it back to form a circle parallel to the main line.
- Wrap the tag end around the doubled line 5-6 times, passing it through the inside of the circle you formed.
- Moisten the line, then pull the tag end to snug the wraps together.
- Finally, pull the main line to slide the knot down securely to the hook eye.
The Uni knot’s versatility makes it useful for fundamental tasks beyond just tying on a hook, including learning how to spool a new fishing reel.
The Improved Clinch Knot (The Classic)
This is a time-tested, reliable knot that has been a favorite for decades. It’s an excellent choice for tying monofilament line to a hook, lure, or swivel.
- Thread the line through the hook eye and make 5-7 wraps around the standing line.
- Pass the tag end through the first small loop that formed behind the eye.
- Now pass the tag end back through the large loop you just created.
- Moisten the line and pull both ends slowly until the knot is tight, then trim the tag end.
This knot is a go-to for securing terminal tackle, which is the first step in learning how to properly bait a minnow for a natural presentation.
The Surgeon’s Knot (The Simplest Joiner)
This is the fastest and easiest knot for joining two lines together. It works perfectly even if the lines have different diameters or are made of different materials, like monofilament and fluorocarbon.
- Lay the main line and leader line parallel to each other, overlapping by several inches.
- Treating the two lines as a single strand, tie a simple overhand knot.
- Pass both lines through the loop a second time. This is what makes it a “Surgeon’s” knot.
- Moisten the knot and pull all four ends evenly to tighten it. Trim both tag ends.
The Rapala Knot (The Lure Animator)
This is a non-slip loop knot that gives your lures more freedom of movement. It’s the perfect choice for lures like crankbaits, allowing them to have a more natural, unimpeded action in the water.
- Tie a loose overhand knot in the line about 5-6 inches from the end.
- Pass the tag end through the lure’s eye and then back through the overhand knot.
- Wrap the tag end around the standing line three times.
- Pass the tag end back through the overhand knot again, then through the new loop that just formed.
- Moisten the line and pull on the main line, tag end, and lure to tighten the knot.
The 3 Mistakes That Cause 90% of Knot Failures
Nearly all knot failures come from three common and easily avoidable mistakes. By understanding these pitfalls, you can ensure your knots are strong and reliable every single time.
- Skipping Lubrication. Tightening a dry knot creates intense friction and heat, which can damage and weaken the line by 20-30% before it even touches the water. The coils can also bind and fail to seat correctly, creating a critical weak point.
- Incorrect Tightening. Jerking the line to tighten it is a common error that causes the wraps to cinch down unevenly. This can even cause parts of the line to cut into each other. A slow, steady pull is crucial for the knot to form its intended, strong structure.
- Mismatched Knot and Line. Using a knot that isn’t suited for your line type is a recipe for failure. For example, the Improved Clinch Knot is excellent for monofilament but is prone to slipping with slick braided lines. For braid, always default to a super-secure knot like the Palomar.
Tying It All Together: The Confidence of a Perfect Knot
The goal was never to learn hundreds of knots. The goal was to gain the confidence that the few knots you do know are tied perfectly every single time. By mastering the essentials and applying the P.L.A.N. Protocol, you have achieved that.
The confidence that comes from knowing your gear is secure is a game-changer. It allows you to focus your mental energy on finding and catching fish, not worrying about whether your equipment will fail at the critical moment.
You are no longer an anxious novice worried about a complex topic. You are now a capable angler who can rig your gear with reliable, proven knots for any situation, ready to make the most of your time on the water.
Frequently Asked Questions
How many fishing knots do I really need to learn?
You don’t need to learn hundreds of knots to be a successful angler. By mastering just 3-5 essential knots like the Palomar, Uni, and Surgeon’s Knot, you can confidently handle over 99% of common fishing situations.
What is the best knot to tie a fishing hook?
The Palomar Knot is widely considered the best and strongest knot for tying on hooks and lures. It is exceptionally reliable, easy to tie, and works perfectly with all types of fishing line, including monofilament and slippery braid.
Why is it so important to lubricate a fishing knot before tightening?
Lubricating a knot with water or saliva is critical because it prevents friction heat from damaging and weakening the line as you pull it tight. This simple step allows the knot’s coils to cinch down smoothly and securely, dramatically increasing its final strength.
What is the most common reason for a fishing knot to fail?
The vast majority of knot failures are caused by three simple mistakes: skipping lubrication, jerking the line tight instead of using steady pressure, or using the wrong knot for your line type. For example, an Improved Clinch knot is prone to slipping with braided line.
What is the easiest knot for joining two different fishing lines?
The Surgeon’s Knot is the fastest and easiest method for joining two lines, even if they have different diameters or are made of different materials. It’s the perfect choice for connecting a fluorocarbon leader to a monofilament or braided main line.
What knot gives a lure the most natural action in the water?
The Rapala Knot is the best choice for maximizing lure action. It is a non-slip loop knot that allows lures like crankbaits and jigs to pivot and move freely, resulting in a more natural and enticing presentation.
How do you tie a basic Fisherman’s Knot?
The Fisherman’s Knot, a common name for the Clinch Knot, is tied by passing the line through the hook eye and wrapping the tag end around the main line 5-6 times. Then, pass the tag end through the small loop near the hook eye, back through the larger loop you just created, and pull tight.
What is the Arbor Knot used for?
The Arbor Knot has one specific purpose: to attach your fishing line or backing to the spool (the arbor) of your fishing reel. It is the very first knot you tie when putting new line onto a reel to ensure it doesn’t slip.